I often find myself wasting time setting up a base for frontend projects involving both React and Redux. Instead of doing it from scratch every single time, thought I’d just commit a brain dump here on my blog.
The sample application that’s built here is a simple random number generator. This application uses ES6 syntax. Before starting to read this post, I’d recommend you to familiarize yourself with the folder structure and source code of this little application, here.
Folder Structure:
- All React components go into the components folder
- app.js is the main starting point for the whole application
- store.js combines all middlewares and reducers together into one redux store.
App.js
The starting point. This file is pretty self-explanatory, the motivation behind each middleware has been added as comments to the source code:
Actions:
Actions are where the main magic happens, all GET,POST,DELETE requests can be placed here. Each action is defined and exported as a function (since we’re using redux-thunk) in this file. In this simple example the action is simply generating a random number and returning it as a string.
Reducers:
Reducers simply change the state of our React Application from one state to the next one. The state for this simple application is simply a JSON object with two keys, one for data and a boolean for error: {data:””, error:false}. Whenever an action is performed, the reducer gets the output of the performed action in the form of the action.payload object. Since we set the data key in our action previously, this is what we’ll get here and simply load it into the new state.
We can have multiple reducers and combine them all in the index.js file in the reducers folder.
Not familiar with ES6? Check out an explanation for the three dots here.
Our Main React Component:
If we want our component to perform an action, we simply import the file that contains our action here. The @connect is used to transfer the store and anything defined inside the callback passed to it into the props of the react object created here. Next, we’re obtaining our application’s state data from our store and displaying it up here. Each of our reducers can be easily referenced as a key of the store object, once you have accessed that, you have access to all your reducer’s state data.
For hooking up actions to components, simply call a store.dispatch function from their respective handlers. In this case, since we’re tying the DO_SOMETHING action to the click of a button. We can create a handler function called doSomethingMore and add it as a member function to this class. Then simply call the dispatch function (which was hooked to our class’s props by @connect) and pass it the action we want to perform as the first parameter.
doSomethingMore() {
this.props.dispatch(doSomething())
}
Then simply call it on the Click event of the button:
<button onClick={this.doSomethingMore.bind(this)}>Randomize</button>
And, finally here’s our complete class:
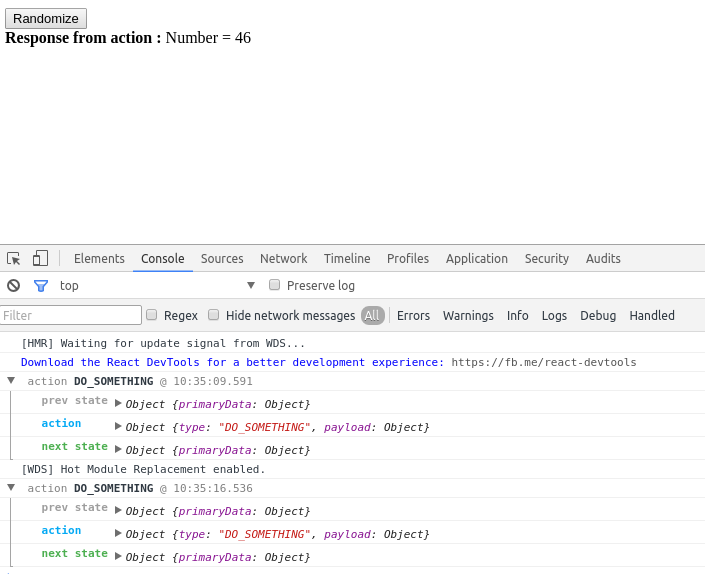
and here’s our little application:
comments powered by Disqus